Feeds:
Posts
Comments

Posts Tagged ‘fish’

The Basque Country in the western Pyrenees spans the border taking in part of South-west France and Northern Spain.  The coastal part of the region, on both sides of the border, is well known for its fish.  Bacalao, or Salt Cod, is a widely used ingredient in both Basque and Spanish cookery.  Salted fish is often associated with Lent, the six and a bit weeks from Ash Wednesday to Easter when, at the end of a long winter, fresh produce was at a premium.  I have recently added a post about how to salt fish at home, which is not a difficult process, however packs of ready salted fish is becoming more widely available in the UK.  I am fortunate to live in an ethnically diverse part of North-east London so usually shop for Salt fish in a local ethnic shop with mostly Caribbean produce, but the major supermarket chains are now starting to stock it too.  I usually buy salted skinless pollack, as it is a sustainable species – I am trying not to buy cod – and quite honestly I can barely tell the difference, especially when it is cooked into a stew.  This recipe, therefore, has been converted for pollack, but if you must then substitute cod – or another white round fish of your choice.

The recipe comes from a library book, The Spanish Kitchen by Pepita Aris.  As I have said previously I substituted ready Salted Pollack, soaked for twenty-four hours before use.  I am yet to try this recipe with home salted fish.  I was also a little unsure about adding the honey specified in the recipe.  Honey with fish?  It seemed  a bit strange!  However as I often add a little sugar to tomato based dishes as it cuts through the acidity I risked the honey and the flavour was not obvious.  The dish was certainly enjoyable.  I notice that there is a similar recipe from Central Spain in Keith Floyd’s book, Floyd on Spain, which includes chick peas.  I’ll have to give that a go sometime as well, perhaps using home salted fish.

'Meanderings through my Cookbook' http://www.hopeeternalcookbook.wordpress.com

Basque Style Salt Cod (Bacalao) in Spicy Tomato Sauce
Bacalao con Salsa de Tomate Picante
(Serves 4)

400g/15oz salt cod/salt fish, soaked in cold water for 24hours
(I used a 300g pack which was adequate with extra pepper)
30ml/2tbsp olive oil
1 large onion
2 cloves garlic
2 green peppers (or one each red or orange and green)
500g/1¼ lb peeled & chopped ripe tomatoes
or
400g/14oz tin tomatoes
15ml/1tbsp tomato purée
15ml/1tbsp clear honey
¼tsp dried thyme
½tsp cayenne pepper
or
½tsp Piment d’Espelette (coarse ground dried Basque pepper)
Juice of ½ lemon
2 potatoes (medium sized)
45ml/3tbsp stale breadcrumbs (be generous – I’m sure I doubled this amount)
30ml/2tbsp finely chopped fresh parsley
Salt & ground black pepper

1.   If using shop bought salt fish it should be soaked in cold water for 24 hours, drained and rinsed before use.  If home made lightly salted fish is used then an overnight soak followed by a rinse should be adequate.

2.   Drain the salted fish, place in a pan, generously cover with water and bring to the boil.  As soon as it boils remove the pan from the heat and set aside until cold.

3.   Heat the oil in a medium sized pan.  Gently fry the onion for 5 minutes and then add the garlic.  Add the chopped peppers and tomatoes and cook over a gentle heat to make a sauce.  Stir in the tomato purée, honey, dried thyme, espelette or cayenne pepper, black pepper and a little salt.  Taste and sea son as required.  Add alittle lemon juice to make it ‘tangier’.

4.   Peel and halve the potatoes lengthways and cut them into slices about the thickness of a coin.

5.   Drain the fish and reserve the cooking water.

6.   Turn on the grill to heat up.  Cook the potato slices for about 8 minutes, with no added salt, in the reserved water.

7.   Flake the fish and remove any skin and bones.

8.   Make up the dish in layers.  First put in a third of the sauce, cover with potato slices, followed by a layer of flaked fish and the finally the remainder of the sauce.

9.   Combine the breadcrumbs and parsley together and sprinkle over the dish.

10.  Place under the grill for 10 minutes until golden brown.

11.  This is a meal in itself but if you wish it could be served with a side salad.
Read Full Post »

Salt has been used as a method of preserving fish for centuries, prolonging its life and thus ensuring a ready supply.  It is widely used in warmer countries where it would otherwise deteriorate very quickly.  Nowadays fish is more commonly preserved by freezing, but the traditional dry salt method is still popular for the distinctive flavour it gives.  Salted fish is not commonly used in traditional British cooking but is widely used across the world, especially in the Mediterranean, Scandinavia and the Caribbean so it is readily available in ethnic food shops, plus it can now often be found in the ethnic aisles of large supermarkets.  I regularly buy blocks of salted skinned boneless pollack for using in recipes such as Hyacinth’s Salt Fish Cakes from the Caribbean or Spanish/Basque Style Salt Cod (Bacalao) in Spicy Tomato Sauce.  Providing it is thoroughly soaked (overnight) and rinsed in two or three changes of water I find this purchased ready salted fish easy to use.  Providing the expiry date on the pack is observed, it does not need refrigeration.  (It can eventually be frozen too if it looks as if it might go out of date before use.)

When my mother in law gave me her copy of Taste of the Sea by Rick Stein I was surprised to see just how easily fish, particularly white fish, can be salted at home.  I experimented with reasonable success with some thawed frozen skinless pollack fillets, just enough for one meal. The instructions are not clear on how salted fish should be kept for long term use, (the recipe suggested it could be stored for up to week but I was nervous about keeping it for that long) so I used the fish just two days into the salting process.  (I also assumed that it needed to be refrigerated until use, even though I store purchased fish in the cupboard.)  It was lightly cured and soft to the touch with a mildly salted flavour but did not have a dried texture (this might have happened with longer salting). This method of salting is simple, but I feel it is worth noting here that it should probably be called lightly salted fish. After some research I discovered a helpful article at Downhomelife  which started with a warning:

Proper salting is a lengthy, fairly complicated process and special equipment or controlled conditions are needed to dry the fish thoroughly and safely.

Which is worth bearing in mind, though these words have now been removed from the article.  However the warning is about drying the fish to avoid poor results.  On the plus side the site also mentions the simple shortened method I had tried:

…the fish is cured in salt in what’s called a “pound” – a square bin where you let the fish soak in salt for about 21 days. If you want a less salty version called “shore fish,” you lightly sprinkle the fish with salt and let it cure for only a couple days.

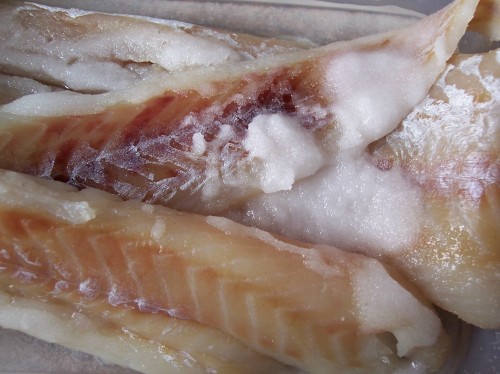
I would certainly not re-freeze fish salted by this method as I am not sure enough that this can be done safely.   If salting fresh fish, rather than frozen, it could be frozen once salted.  Below is my version of salted fish.  My picture was taken 24hrs after salting.  In the end I consider this a simple way of lightly salting fish, providing the process takes place two days ahead of the date the fish is required.   It is a method I would be happy to use again, especially as I prefer the milder flavour, but I will probably also continue to buy the blocks of salted fish as they are so convenient.  Other useful links are this overview of  Salt fish giving a helpful list of types and names around the world, this article at ehow with a similar method to that given by Rick Stein and this enlightening Ezine Article.  I would be interested to hear from any readers who have successfully tried salting fish at home by the Rick Stein method, or similar.

If you have not smelled salt fish then you would be advised to do so before you make your own to give a guideline.  Salt fish has a different, much stronger, aroma from fresh fish but if really unpleasant then discard the fish and do not take the risk. Often purchased salt fish smells particularly strong but we have never suffered ill effects.   

'Meanderings through my Cookbook' http://www.hopeeternalcookbook.wordpress.com

Salted Fish

Fillets of White Fish (Cod, Haddock, Pollack, Coley or similar)
Salt (Type not specified in the original – I used Rock Salt)
A large plastic container big enough to hold the fish without overlapping

1.  If using frozen fish then it should be thoroughly defrosted before salting and should not be re-frozen.

2.  Pat the fish fillets dry with kitchen paper and put them in the plastic container in a single layer without overlapping.

3.  Completely cover the fish with a thick layer of salt.

4.  Put a cover on the container and refrigerate for 24hours.

5.  After 24hours most of the salt will have turned to brine with the water drawn out of the fish.

6.  This fish will now be sufficiently preserved to keep for up to a week in the refrigerator.  The recipe does not say what to do with the brine but I poured away the excess liquid, leaving the patches of undissolved salt to continue the process.

—–

To prepare salt fish for cooking it should be soaked in plenty of cold water.  If it is lightly salted this will take just an hour or two but fish that is more dried out should be soaked for up to 24hours. I usually give it a second quick rinse in cold water before use.

Read Full Post »

What could be better for a Summer Sunday lunch on a scorcher of a day – a ‘too hot to cook’ type of hot day!  I was delighted when I discovered this recipe on the back of the pack of tuna and it was perfect for a busy day, just before we went on holiday, when lots of cooking was the last thing on my agenda.  (We followed it with an ice cream dessert).   Salad Niçoise is a specialty of the Côte d’Azur region of France, originating in and named after the Mediterranean port city of Nice.  Traditionally red peppers and shallots are used with the French insistent that no cooked vegetables be added, whilst it is not always usual to include salad leaves.   With these reservations, Salad Niçoise is usually understood to be a mixed salad which includes four essentials: tuna, egg, French green beans and olives mixed with other salad ingredients, all of which is tossed with a vinaigrette dressing.

My recipe starting point was found on the back of a pack of Finest Catch Frozen Tuna Steaks.  (This appears to be a small company without a website address, but their fish retails through a small nationwide chain of supermarkets and I have been very pleased with it, especially their Oak Smoked Haddock.)  I find frozen tuna steaks easy to use and relatively economical though if I was cooking for a special occasion I would choose fresh tuna steaks.  Alternatively, this can be served at a buffet with the tuna steak replaced with the contents of two tins of tuna chunks, which are placed on top just before serving at the same time as the eggs and olives.  (It should go without saying that Tuna should come only from a sustainable source and be line caught.)  I had all the ingredients to hand, the one exception being that I had a jar green olives already open, so decided to use these rather than the usual black ones.  I added a couple of additional salad ingredients which we usually enjoy: cucumber and pepper, this time orange.

'Meanderings through my Cookbook' http://www.hopeeternalcookbook.wordpress.com

Salad Niçoise
(Serves 4) 

4 Tuna steaks  (or 2 tins of Tuna chunks in brine, drained)
1tbsp butter
1tbsp olive oil
juice of ½ lemon
salt & black pepper

For the salad:
2oog small new potatoes (cook with a sprig of mint, optional)
2 hard boiled eggs, quartered
175g green french beans, topped & tailed
100g lettuce (original recipe suggests 1 head Romaine – I substituted a mixed bag)
150g cherry tomatoes, halved (or larger tomatoes cut into quarters or eighths)
1 small red onion, finely sliced
50g pitted olives, black (original recipe) or green or mixed colours
4inches/10cm cucumber cut into four lengthways and chopped
1 orange/red/yellow pepper diced (optional)
6tbsp vinaigrette dressing (have more available if needed)

1.  Scrub the potatoes and boil until soft.  Add a sprig of mint to the boiling water (optional).  Drain and cool.

2.  Hard boil the eggs in their shells.  Cool immediately in cold water to avoid a grey ring around the yolk.  When cool, crack and remove the shell, quarter and set aside.

3.  Blanch the beans by pouring over boiling water which should be just enough to slightly soften while they retain their bright green colour.  Immerse in cold water to stop them from overcooking, drain and set aside.

4.  Prepare the remaining salad items except for the olives and pieces of egg.  Stir in the cooled potatoes and beans.  Dress with the vinaigrette and gently mix together.

5.  Melt a little butter in a frying pan and add a little olive oil and heat until the butter has just melted.  Place the Tuna steaks in the saucepan, season with salt & pepper and squeeze over the lemon juice.  When the Tuna steak has a light colour on on one side, turn it adding a little extra olive oil if necessary and cook until the second side is also lightly coloured.  The fish should not be overcooked and should still be a little pink in the centre.  Alternatively, cook the Tuna steak in your own preferred way.

6.  Serve a pile of salad onto each plate, placing a still warm tuna steak on the top and decorating with the pieces of egg and olives.  Alternatively serve the tuna steaks separately, decorating one large dish of tossed salad with the olives and egg pieces so that guests can serve themselves.  Drizzle just a little extra olive oil over the salad if you wish, or have extra dressing and seasoning available for guests to help themselves.

Read Full Post »

This Far Eastern inspired, slightly spiced fish stew gives a nod to the Pacific islands with its coconut-creaminess.  It is easy to make and full of colour and flavour.  Although it originally appeared in a Winter, January, issued magazine it would be just as good served in the summer months. 

The original recipe called South Pacific Fish came from the ASDA supermarket free instore magazine, January 2009 issue.  I made a few adaptations for my version.  The original lists a tin of chopped tomatoes with chilli and peppers: I used a plain tinned tomatoes and added a red and green pepper, chopped and a small chilli (a larger chilli can be added for hotter dish).  In place of the can of coconut milk I used 50g of creamed coconut (grated from a block) with a little water: the first time I made it I used ½pint of water but this made the sauce too watery.  The next time I used just ¼pt, reasoning that I could always add a little more water if it was too dry.  It is important to avoid having to reduce the liquid as the fish can easily be overcooked.  I added a few prawns in place of some of the white fish to add variety.  I also added a few diced okra and their sticky juices helped to thicken the stew a little, but they are not really necessary and certainly should not be cooked for too long if used.   The original recipe had 75g chopped macadamia nuts scattered over as it was served, but I did not feel this was really necessary – and anyway there were none in my cupboard.  This dish would be delicious with chicken substituted in place of the fish.

Vegetarian variation: in place of the fish, add a tin of chick peas or red kidney beans and chunks of green banana 5-10 minutes before serving.

'Meanderings through my Cookbook' http://www.hopeeternalcookbook.wordpress.com

South Pacific Fish Stew
(Serves 4)

2tbsp vegetable oil
1 medium onion
1 clove garlic, finely chopped
1 de-seeded green chilli, finely chopped
2.5cm/1inch piece of root ginger, peeled & grated
1tsp ground coriander
1tsp ground turmeric
450g/1lb sweet potato
50g grated creamed coconut
¼pint boiling water
400g/14oz can of plum tomatoes, liquidised or chopped
1 red pepper, diced
1 green pepper, diced
1 yellow pepper, diced (optional – omit if adding okra or another vegetable)
225g/8ozs okra, cut into small rings
450g/1lb white fish, skinned & cut into large chunks
110g/4ozs small prawns (optional – reduce white fish amount slightly if using)
Fresh coriander leaves, chopped – to serve
Finely chopped, de-seeded red chilli – to serve (optional – for heat lovers)

1.  Heat the oil in a large pan and gently cook the onion until soft.  Add the garlic, ginger and chopped chilli.  Continue to cook for another minute.  Stir in the ground coriander and turmeric and cook, stirring, over a low heat for a further minute.

2.  Peel the sweet potato just as it is about to be used (so it does not blacken).  Cut them into 2.5cm/1inch chunks.  Add to the onion mixture and stir so they are well coated. 

3.  Dissolve the grated creamed coconut in the boiling water (alternatively use a 400ml can of coconut milk as in the original recipe). 

4.   Stir in the coconut milk, well chopped or liquidised tomatoes and peppers and bring to the boil.  Reduce heat and simmer, uncovered, for about 10 minutes, or until the potato pieces are nearly cooked.

5.  Add the chunks of fish, plus the prawns and okra, if using, and simmer the mixture gently for 5 minutes more.  To avoid breaking up the fish pieces, from this point onwards the pan should be shaken rather than stirred but watch carefully that the heat is not too high causing the bottom of the stew to burn.  If the mixture seems dry then a little more boiling water can be added, but be careful not to add too much.

6.  When it is ready to serve, the sauce in the stew should be slightly thick, with any okra used helping to thicken the sauce.

6.  Serve on a bed of rice.  Garnish with a generous scattering of chopped coriander leaves.  Finely chopped red chilli can also be added for those who would like the extra heat.

Read Full Post »

This delicious sounding recipe caught my eye some years ago when I was leafing through a cookbook that my mother-in-law had been given for Christmas.  I think the attraction was partly due to its simplicity and partly because of the way the bacon adds extra flavour to the herring.

The book in question was Taste of the Sea by Rick Stein.  I scribbled the recipe down as it was not too complicated and we enjoyed it the following week.  I have made it on a number of occasions since, finding that it tastes equally as good when mackerel fillets, which are often a bit larger, are substituted for the herring.  The bacon really does add a lovely flavour and this recipe would not be the same without it.  It is delicious when served with a creamy mild mustard sauce or mild mustard mayonnaise (such as Dijonnaise) and accompanied with simple boiled, preferably new, potatoes, green vegetables or salad.

'Meanderings through my Cookbook' http://www.hopeeternalcookbook.wordpress.com

Herrings (or Mackerel) in Oatmeal with Bacon
(Serves 4)

4 x  herring or mackerel fillets (around 225g/8oz each)
100g/4oz oatmeal
25ml/1fl oz vegetable oil
4 rashers streaky bacon, cut into thin strips (or 100g/4ozs bacon pieces)
salt and freshly ground black pepper
1 lemon, cut into wedges

1.  Fillet the herrings or mackerel.

2.  Place the oatmeal into a shallow bowl.  Season each fillet and dip in oatmeal, pressing it onto the fish as much as possible until each piece is well covered.

3.  Heat the oil in a frying pan.  Fry the pieces of bacon until crisp. Remove the pieces from the pan, leaving behind as much bacon fat as possible and keep warm.

4.  Place the fillets, flesh side downwards, in the bacon flavoured oil and gently fry them in the same pan oil.  Turn once and continue to cook until golden brown on both sides.  Try to avoid losing too much oatmeal covering.

5.  Serve the fillets with the bacon sprinkled over the top along with lemon wedges.  Good accompanied with boiled, preferably new, potatoes with a sprinkling of chopped parsley and a side salad.  A spoonful of mustard flavoured mayonnaise – or Dijonnaise sauce – is a delicious accompaniment.

Read Full Post »

The inspiration for this colourful recipe was provided some years ago by a contestant on the BBC programme Masterchef.  The contestant did not win: actually I think that he or she may not have progressed to the next round of the competition, however we all thought the dish produced was a winner.  I cooked it the very next day and it was delicious – and then forgot about it.  Why I did not write anything down I don’t know!  Several months later we remembered it again, but not the exact ingredients, so this recipe is a guess – and I think I have remembered fairly well, though have possibly added some ingredients not in the original.  Anyway, irrespective of how true it was, we are happy with the result.

If anyone has any information on the original Masterchef recipe or chef I would love to know – I think it was the 2008 competition initial heats. The combination of white fish, butter beans and pepper is really well complemented by the chorizo.  A little smoked or unsmoked bacon could be added as well for extra flavour.  As an alternative, the fish can be cut into pieces and mixed in with the vegetable mixture and either transferred to the oven as below or finished on the stove top. The chorizo and peppers give this dish a Spanish flavour and in the Basque country bakaiļao (bacalao – Spanish) or Salt Cod is often used, although I have not used it myself.  Salted cod should be soaked for at least 2 hours before draining and using and the dish may need little or no added salt.  See also my post on making Salt Fish at home.

100_4860 Fish w chorizo, b beans & peppers

'Meanderings through my Cookbook' http://www.hopeeternalcookbook.wordpress.com

White Fish with Chorizo, Butter Beans & Red Pepper
(Serves 4)

1 tbsp olive oil
1 large white onion, diced
100g/4ozs bacon (smoked or unsmoked – personal preference)
50g/2ozs chorizo, diced
1 large red pepper, deseeded and chopped
400g/14oz tin of butter beans, drained and rinsed
4  tomatoes, quartered (can use tinned plum tomatoes if fresh not available)
4 pieces white fish (I used pollack, but another type can be substituted)
Zest and juice of ½ lemon
A little more olive oil to drizzle
Salt & black pepper
Chopped parsley to serve

1.  Preheat the oven to 190°C/375°F/Gas 5.

2.  Gently fry the diced onion and bacon together in the olive oil until the onion is transparent.  Add the diced chorizo, chopped red pepper, butter beans and tomatoes and cook for a further 2-3 minutes.  Season to taste.

3.  Tip the vegetable mixture into a large shallow dish and place the pieces of fish on top in a single layer.  Add the lemon juice with a drizzle of olive oil and scatter over  the zest.

4.  Cover with a lid or foil and bake for 30 minutes, or until the fish is cooked through, uncovering the dish for the final 5 minutes of cooking time.

6.  Serve the fish on top of the mixed vegetables, sprinkled with a little reserved lemon zest, chopped parsley and accompanied with a side salad and crusty bread.

Read Full Post »

Every so often there is a good recipe on the back of a packet of food that is worth trying out.  This is just such a one.  It proved to be as straightforward as it seemed and was an instant hit with my family: we ate it two weeks running after a repeat was requested.  This is a very colourful dish and has plenty of flavour, with the strong flavour of the smoked fish delicious in combination with the onion and tomato, while the rosemary gives an unusual fragrance.  Actually, the flavour was not unlike the smokiness of bacon.  Smoked fish is often served at breakfast or brunch and this would be an unusual and interesting recipe to serve at that meal. 

The original recipe for Smoked Haddock, Cheese and Tomato Bake came from a packet of Youngs Smoked Haddock and a visit to Youngs Seafood website, advertised on the packaging, led me to a host of other good recipes. I have amended some of the quantities and proportions of ingredients in the original recipe but it is broadly the same.  I do not think the recipe needs any additional salt, but be aware that this depends on the saltiness of the fish and personal preference.  The recipe also recommends using very ripe plum tomatoes if they are available as they give added sweetness to the dish, though other varieties can be used.  I usually add a half teaspoon of sugar to savoury dishes which contain tomato as this helps to counter any acidity in the tomatoes and also gives a little extra sweetness, although this is not detectable.

'Meanderings through my Cookbook' http://www.hopeeternalcookbook.wordpress.com

Smoked Haddock, Cheese & Tomato Bake
(Serves 4)

375g/12ozs skinless & boneless Smoked Haddock Fillet
3-4 red Onions, sliced
6-8 ripe Tomatoes, Plum if available, quartered
 ½tsp sugar
2 Garlic Cloves, peeled & crushed
2-3 sprigs of fresh Rosemary
½ of a 125g/4oz ball Mozzarella cheese, sliced (freeze remainder for next time!)
50g/2ozs grated Mature Cheddar Cheese
Olive Oil
Freshly ground Black Pepper

1.  Preheat the oven to 190°C/375°F/Gas 5.

2.  Gently sauté red onions, garlic and tomato quarters in olive oil in a frying pan for 2-3 minutes until tomatoes have softened.  Stir in the sugar and season lightly with black pepper.

3.  Pour the onion and tomato mixture evenly into the bottom of an ovenproof dish.  Place the pieces of Smoked Haddock on top. Season with a little more black pepper.  (Salt can be added, although this is not really necessary as the smoked haddock has already been salted.)

3.  Place the pieces of Mozzarella evenly over the fish and then sprinkle the grated cheese generously over the top.

4.  Place the sprigs of Rosemary evenly top and finish with a drizzle of olive oil.

5.  Stand the dish on a baking tray.  Cover with foil and bake for 10 minutes covered and then a further 10 minutes with the foil removed, or until golden brown.

6.  A Cucumber & Mint salad makes a refreshing accompaniment and is good as part of a larger green leaf and tomato salad.  Serve with crusty bread.  Alternatively serve the with peas and some minted new potatoes, plus the the cucumber & mint salad.

Read Full Post »

Ratatouille Niçoise or Provençale, is usually associated with France, in particular the region of Provençe, however its ingredients and flavours are commonly found throughout the Mediterranean.  I find it makes sense to make an extra large quantity as it freezes well.  This very convenient recipe can use freshly made or frozen (and completely defrosted) Ratatouille.  It can be assembled quickly using frozen white fish and fresh spinach plus the flavourings and seasonings.

The recipe, originally called Moroccan Fish Fillets, was printed on a Sainsbury’s free instore recipe card in the Feed your family for a Fiver series.  I have no idea whether the original recipe is authentically Moroccan, but it did not include any of the seasonings I usually associate with the region.  This is my adaptation of the original recipe adding some of these flavours, hence the name change.  I substituted spinach for the leafy spring greens that were originally suggested, but in a smaller quantity, plus I used home made Ratatouille Niçoise/Provençale (with our usual favourite added dried orange peel) in place of the tinned version. (As the home made Ratatouille already contains Herbes de Provence adding mixed herbs is unnecessary.)  Additionally, I added Pickled or Preserved Lemon and Ras el-Hanout spice mixture (my home made version), with sumac powder and fresh coriander to serve.  The original recipe also included a tin of chick peas to be mixed with couscous as part of an accompanying side dish.  This recipe is good when accompanied by my own recipe for Coriander & Chickpea Couscous Salad.

'Meanderings through my Cookbook' http://www.hopeeternalcookbook.wordpress.com

North African Style Fish Fillets
(Serves 4)

1 bunch of Spinach (original used Spring greens)
Ratatouille Niçoise/Provençale, quantity to feed four
½-1tsp Ras el-Hanout
4 pieces of frozen (or fresh) white fish fillet: pollock, cod or haddock
Slices of Pickled or Preserved Lemon, plus a little of the preserving juice
Olive oil
Salt & black pepper
Sumac powder to sprinkle (to taste)
Fresh coriander, chopped

1.  Preheat the oven to 200oC/Fan 190oC/400oF/Gas 6.

2.  Chop the spinach, rinse and place, without precooking, in a large ovenproof dish.

3.  Stir the Ras el-Hanout into the Ratatouille Niçoise/Provençale and pour over the spinach.

4.  Top with the pieces of frozen fish (no need to de-frost) and top each piece of fish with one or two slices of preserved/pickled lemon.  Spoon a little of the juice from the jar of lemons over each fillet along with a little olive oil. 

5.  Sprinkle with a little sumac powder and season with some salt and black pepper.

6.  Cover with aluminium foil making sure the dish is completely covered so the flavours are sealed in.

7.  Bake for 45 minutes, until the fish is completely cooked through, removing the foil for the last 5 minutes or so.

8.  Serve with a little more sumac and chopped fresh coriander (not dried) sprinkled over, accompanied by couscous.

Read Full Post »

I have eaten lots of Caribbean Salt Fish Cakes but my friend Hyacinth, originally from Jamaica, definitely makes the very best Salt Fish Cakes in E17!  They always ‘go like hot (fish) cakes’ when she brings them to church shared lunches.  One thing that makes them particularly good are that they are crispy outside, soft inside and most importantly, unlike some I have tried, they are never ever greasy!  I managed to get her recipe and I share it with you here…

The quantities given on the original recipe were approximate, so could be slightly increased to feed another person by adding a little more flour and another egg.  The original recipe called for 8ozs flour and 2 eggs.  I misread the original hand written recipe and I added finely chopped green pepper, but we liked the flavour and colour so I decided to keep it in.  I also decided to slightly pre-cook and cool the onion and pepper, so it is properly cooked, as the eventual cooking time for the dish is not long.  A squeeze of lemon juice, if you wish, helps enhance the flavour.  Do not be tempted to add any more salt!

'Meanderings through my Cookbook' http://www.hopeeternalcookbook.wordpress.com

Hyacinth’s Salt Fish Cakes
(Serves 2-3 or 4+ as a starter)

5ozs/150g pack of boneless, skinless salt fish pieces (usually Pollack or Cod)
4ozs/125g Self Raising Flour
1 egg
1 small onion, very finely chopped
½ green pepper, very finely chopped (optional)
1tbsp tomato purée
Black pepper
1tsp lemon juice (optional)
Oil for frying

1.  At least 1hour before you are going to make the fish cakes, place the salt fish in a bowl and cover with cold water.  Change the water immediately and cover fish again with water.  Leave for about one hour, changing the water once more. 

2.  If you have a microwave oven then place the finely chopped onion and green pepper together in a small bowl and cook, covered, for 1minute.  Alternatively, cook together in a small saucepan with a little water over a low heat for 2-3 minutes until the liquid has evaporated.  Do not let the onion and pepper start to colour.  Put to one side and do not use until it has cooled – it can go in the fridge once it is no longer hot.

3.  Drain the fish in a colander or sieve. As much water as possible should be squeezed out before the fish is used.  Chop the fish as finely as possible, checking that there are no bones and removing them if necessary.

4.  Break the egg into a large bowl and whip.  Mix in the flour.  Stir in the fish, tomato purée, onion, pepper, plus lemon juice if using, until well mixed.  Draw the mixture together into a ball.  If it is a little sticky then add some more flour if needed. 

5.  Form the mixture into 8 or 9 equal sized flattened cakes: 2 or 3 per person – depends on how many people you are feeding.  If serving as a starter then divide mixture into smaller cakes.

6.  Place in the fridge for 10 minutes or until ready to cook. 

7.  Heat a little oil in a frying pan and fry the cakes very gently until golden brown on both sides.  Each cake will stick slightly but once it is set it can be turned easily.  Allow the cakes to seal on one side before you turn them to avoid them breaking up.  Keep warm under a gentle grill until needed.

8.  Serve with Rice & Peas and Fried Plantain and a few green peas or some salad leaves.

Read Full Post »

This way of cooking salmon was simple with a beautiful citrus flavour and was perfect for lunch on a warm late Summer Sunday.  The fish was placed on a bed of tomatoes in a greaseproof parcel, topped with a knob of flavoured butter and a slice of lime before being baked in the oven.  As well as using lime as a garnish, I squeezed lime juice over the fish before cooking.  The lime slices looked rather sad when they had been cooked so I suggest they are added towards the end of cooking time so they would be fresher and more attractive.  It was one of those days when I had no fresh basil in the house so I had to substitute dried: it was just about satisfactory, but I would definitely use fresh if available. The original recipe suggested individual parcels of fish and this would be lovely if being served at a dinner – one parcel per guest.  However, for a family meal it would be perfectly satisfactory to wrap all portions in the same parcel, with aluminium foil being much easier to use than greaseproof paper or baking parchment. 

Lime & Basil Baked Salmon Parcels was a slight adaptation of a recipe taken from a book found in the library, Cooking with Salmon, the King of Fish by Jane Bamforth.   Originally called Herby Salmon Parcels, this is one of several recipes I made and we enjoyed from the book.

100_4623 Herby Lime Baked Salmon Parcels

'Meanderings through my Cookbook' http://www.hopeeternalcookbook.wordpress.com

Lime & Basil Baked Salmon Parcels
(Serves 4)

1 lime
50g/2ozs butter, softened
2tbsp finely chopped fresh basil (or 1tbsp dried basil if fresh unavailable)
4 tomatoes, sliced – preferably Italian plum tomatoes if available
1 garlic clove, finely chopped
4 salmon fillets (one per person)
1tbsp olive oil
Salt & pepper to season

1.  Remove the rind from the lime with a zester, taking care not to remove any white pith.  Cut the lime into 8 slices on a plate and reserve any lime juice that collects.  Add the butter and chopped basil to the lime zest and blend well.  Roll this butter mixture into a log shape and chill in the refrigerator.

2.  Pre-heat the over to 190oC/375oF/Gas 5.  Cut one piece of greaseproof paper or baking parchment per portion, large enough to fold over and hold together.  Alternatively cut one large piece of parchment or aluminium foil big enough to hold all portions and fold over.

3.  Arrange one sliced tomato for each portion of fish, sprinkle each equally with the garlic and season.

4.  Place one piece of salmon on top of each tomato pile.  Cut the butter log into four equal pieces and put on top of the fish.  Tip any lime juice that has collected with the slices equally over the pieces of fish. Drizzle each with a small amount of olive oil.

5.  Fold the paper over to make neat parcels, tucking the ends upwards so that the juices are contained.  If they do not keep together then the paper can be stapled, but be very careful to remove each staple before serving.

6.  Place on a baking tray and bake for 15 minutes.  Five minutes before the end of the cooking time open each parcel (dispose of any staples you have used) and place two slices of lime on each piece of fish.  Leaving the parcels open cook for a further five minutes.

7.  The salmon can be served in its opened parcels, however as the paper becomes discoloured during cooking it is probably more attractive to remove it.  Serve with new potatoes and a green vegetable.

Read Full Post »

Older Posts »